How to Plan a Disney Themed Birthday Party at Home

Bringing the Magic Home: A Strategic Guide to Disney-Themed Birthdays
Imagine a seven-year-old walking into your living room to find a perfectly curated "Mickey Mouse Clubhouse" setup, complete with a customized snack station and a scavenger hunt that feels like a real-world adventure. A successful Disney-themed birthday party relies on cohesive storytelling and high-impact visual cues rather than just buying every piece of licensed merchandise you see. This guide provides a structured, project-managed approach to planning a high-quality, immersive Disney celebration at home without the premium price tag of a park experience.
Planning a themed event requires moving from a broad concept to specific execution phases. Whether you are aiming for the elegance of a Cinderella ball or the high-energy chaos of a Marvel superhero training camp, the key is consistency in color palettes, textures, and sensory details. By treating your party like a small-scale production, you can control the budget and ensure the "magic" remains the focus.
Phase 1: Defining Your Sub-Brand and Color Palette
The most common mistake in themed parties is trying to include too many characters. A "Disney Party" is too broad; a "Star Wars: Galactic Empire" party or a "Moana Tropical Adventure" is a specific brand identity. Once you select your sub-theme, establish a strict color palette of no more than three primary colors. This prevents the decor from looking cluttered or cheap.
- The Classic Mickey: Red, black, and yellow. Use solid-colored tablecloths to keep the look sophisticated.
- Frozen Winter Wonderland: Ice blue, silver, and white. Incorporate iridescent textures to mimic frost.
- Toy Story Adventure: Primary colors (blue, yellow, red) with subtle patterns like clouds or cowboy motifs.
- The Princess Aesthetic: Pastel pinks, lavenders, and gold accents.
Defining these parameters early allows you to shop with intention. When you go to a retailer like Target or even a local craft store, you aren't looking for "Disney items"—you are looking for items that fit your specific color and texture requirements. This is how you achieve a high-end look on a retail budget.
Phase 2: Setting the Scene with Immersive Decor
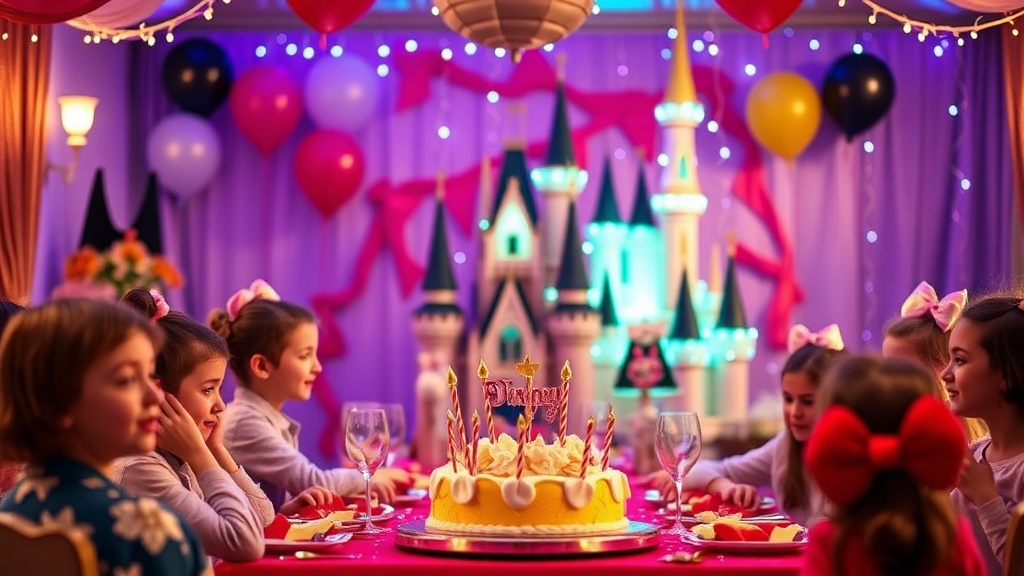
Decor should be divided into three zones: the entrance, the main focal point (the food/cake table), and the activity area. This creates a sense of progression as guests move through your home.
The Entrance: Set the tone immediately. For a Pirates of the Caribbean theme, use weathered rope and wooden crates. For a Tangled theme, hang faux wisteria or lanterns near the door. This small investment signals to guests that they have entered a different world.
The Focal Point: The dessert table is the "center stage" of your party. Instead of scattered plates, use tiered stands of varying heights. Use a high-quality backdrop, such as a sequined fabric curtain or a custom vinyl banner, to create depth. If you are hosting a movie-centric party, consider integrating your setup with your home theater. If you have already learned ways to build a Disney inspired home cinema, use your projector to display a looping "ambiance video" on the wall behind the cake—such as floating lanterns from Tangled or drifting snow from Frozen.
Lighting: Never rely on harsh overhead lights. Use string lights, LED tea lights, or colored smart bulbs to soften the atmosphere. For a Toy Story theme, bright and cheerful lighting works; for a Nightmare Before Christmas theme, use dim, moody lighting with purple and green accents.
Phase 3: The Menu—Edible Storytelling
Food is an opportunity to reinforce your theme through clever naming and presentation. You do not need a professional caterer; you simply need a creative way to label standard party fare. A well-organized menu is more memorable than an expensive one.
Menu Examples:
- The Jungle Cruise Theme: "Safari Sliders" (mini cheeseburgers) and "Fruit Kabobs" (tropical fruit skewers).
- The Avengers Theme: "Shield Cookies" (round sugar cookies with red, white, and blue frosting) and "Gamma Ray Juice" (green fruit punch).
- The Cinderella Theme: "Pumpkin Macarons" or "Glass Slipper Pretzels" (white chocolate-dipped pretzels).
The Pro-Tip: Themed Drink Station: Instead of individual juice boxes, create a "potion station" or a "mocktail bar." Use a large beverage dispenser filled with a colorful drink like blue Gatorade for a Finding Nemo theme, and provide small, reusable cups with themed stickers. This reduces waste and adds an interactive element to the meal.
Phase 4: Managed Entertainment and Activities
A common pitfall is failing to account for the "energy arc" of the party. Children often start with high energy, peak during the main activity, and then crash. Plan your activities to follow this curve.
Low-Intensity Arrival Activities: As guests arrive, provide something low-pressure. A coloring station with Disney-themed sheets or a "build your own ears" station (using plain headbands and felt cutouts) allows kids to settle in without being overwhelmed.
High-Intensity Main Event: This is the core of your party. Instead of generic games, use a scavenger hunt that mimics a Disney quest. For a Peter Pan theme, have them find "Lost Boys' Treasures" hidden around the yard or living room. For a Star Wars theme, a "Lightsaber Training" session using foam props is highly effective.
The "Wind-Down" Moment: Toward the end of the party, transition to a seated activity. This is the perfect time to screen a short Disney film or a compilation of clips. If you have curated a collection of media, this is where the atmosphere truly comes together. For example, if you have a curated collection of music, playing a Disney soundtrack in the background during the wind-down phase helps transition the mood from high-energy play to a calm departure.
Phase 5: Budget-Friendly Party Favors
Avoid the "plastic junk" trap. Most party bags filled with cheap, disposable toys end up in the trash within a week. Instead, choose one or two higher-quality, themed items that have longevity. This is more sustainable and more appreciated by parents.
- Themed Books: A classic Disney storybook is a wonderful keepsake.
- Art Kits: A small set of colored pencils and a Disney-themed sketchbook.
- Practical Items: A themed water bottle or a high-quality decal for their tablet or water bottle.
When assembling these, use simple kraft paper bags and tie them with a ribbon that matches your color palette. This maintains the aesthetic consistency right down to the moment the guest leaves your home.
The Execution Checklist
To ensure nothing falls through the cracks, follow this timeline:
- 4 Weeks Out: Finalize the sub-theme and color palette. Order any custom items (banners, specialized plates) online.
- 3 Weeks Out: Send digital invitations. Specify if there is a "costume" or "dress-up" component.
- 2 Weeks Out: Purchase non-perishable decor and any DIY supplies (felt, glitter, cardstock).
- 1 Week Out: Finalize the menu and grocery list. Confirm guest count.
- 2 Days Out: Grocery shop for fresh ingredients. Begin any heavy food prep (baking, chopping).
- 1 Day Out: Set up the decor and the "zones." Test your lighting and any tech (projectors/speakers).
- Day Of: Assemble the food, set out the drink station, and enjoy the magic you've created.
"The most successful events aren't defined by how much you spend, but by how well you manage the details that create an atmosphere."
By applying these organizational principles, you move away from the chaos of a standard birthday party and toward a curated, professional-grade celebration. You don't need a Disney budget to create a Disney experience; you just need a clear vision and a strategic plan.
Steps
- 1
Choose Your Character or Movie Theme
- 2
Set a Color Palette Based on Your Theme
- 3
Create Themed Snacks and Drinks
- 4
Set Up a Disney Soundtrack