How to Build Your Own Enchanted Disney Castle Diorama

Bringing the Magic Home: A Strategic Guide to Building Your Enchanted Disney Castle Diorama
If you’ve spent any time scrolling through Disney enthusiast forums or browsing high-end collectibles, you know that the "Castle" isn't just a landmark; it’s a symbol of ultimate achievement. Whether it’s the pink-hued spires of Cinderella Castle or the rugged majesty of Sleeping Beauty Castle, these structures represent the pinnacle of storytelling. However, as a former project manager, I look at the $500+ price tags on professional-grade display models and see a massive inefficiency in the "fun-to-cost" ratio. Why pay a premium for a mass-produced plastic replica when you can engineer a bespoke, high-detail masterpiece right on your dining room table?
Building a diorama is a lot like planning a Disney vacation: it requires meticulous resource allocation, a clear timeline, and a vision for the final "reveal." In this guide, I’m going to walk you through the structural and aesthetic phases of creating an enchanted castle diorama. We aren't just making a craft project; we are building a centerpiece that captures the scale and wonder of the parks.
Phase 1: The Blueprint and Resource Procurement
Before you touch a single drop of glue, you need to define your scope. Are you building a minimalist, stylized version of a castle, or a hyper-realistic, textured monument? In project management terms, this is your Project Charter. I highly recommend choosing a specific "era" or "theme" to keep your aesthetic cohesive.
The Essential Toolkit:
- The Foundation: A sturdy wooden base or a thick piece of high-density foam board. This provides the structural integrity needed to support the weight of your spires.
- Structural Elements: Foam core, cardboard tubes (for towers), and XPS foam (extruded polystyrene). XPS foam is a game-changer because it can be carved and melted to create realistic stone textures.
- Adhesives: A high-temperature glue gun for rapid assembly, and PVA glue (white glue) for permanent, structural bonds.
- Texturing Tools: A hobby knife (X-Acto), a wire brush, and a soldering iron (for melting "stone" details into foam).
- Lighting: A string of micro-LED fairy lights or a small LED strip kit.
When sourcing your materials, I advocate for a sustainable approach. Instead of buying brand-new plastic kits, look through your recycling bin for high-quality cardboard and containers. Just as you might look for zero-waste pantry overhaul ideas to clean up your kitchen, you can repurpose household items to build your architectural components. This not only saves money but adds a layer of creative problem-solving that a pre-made kit simply can't offer.
Phase 2: Structural Engineering and Scaling
The most common mistake beginners make is failing to account for scale. If your castle towers are too thin, they will look like toothpicks; if they are too thick, the castle will look stunted. I recommend using a 1:100 or 1:200 scale for a tabletop display.
Step 1: The Base and Layout
Lay out your base and use a pencil to sketch the footprint of your castle. This includes the main keep, the flanking towers, and the curtain walls. This "sketch phase" is vital. If you don't map out the footprint, you might find yourself with a tower that has nowhere to sit once the walls are built.
Step 2: Building the Towers
Cardboard tubes or rolled-up foam core are your best friends here. For a more "enchanted" look, don't make the tops flat. Use conical shapes for the roofs. If you are using foam, you can use a soldering iron to gently melt small indentations into the surface, simulating weathered stone or aged masonry. This level of detail is what separates a "school project" from a "collector's piece."
Step 3: The Walls and Connecting Corridors
The walls should be slightly lower than the towers to create a sense of hierarchy. Use foam core to create the rectangular sections between your towers. To add depth, "cut out" windows or arrow slits before you glue the sections together. This creates a much more realistic silhouette when light hits the structure from the inside.
Phase 3: Texturing, Painting, and the "Magic" Factor
This is where the transformation happens. A gray piece of foam is just a piece of foam until you apply the "Disney Magic." In the professional world, we call this the Polishing Phase.
The Layering Technique:
Never use just one color. A realistic castle has layers of history. Start with a base coat of a mid-tone gray or beige. Once dry, use a "dry brush" technique with a lighter color (like off-white or light blue) to catch the raised edges of your stone texture. Finally, use a very dark wash (watered-down black or dark brown paint) to settle into the crevices. This creates artificial shadows and depth.
Integrating Light:
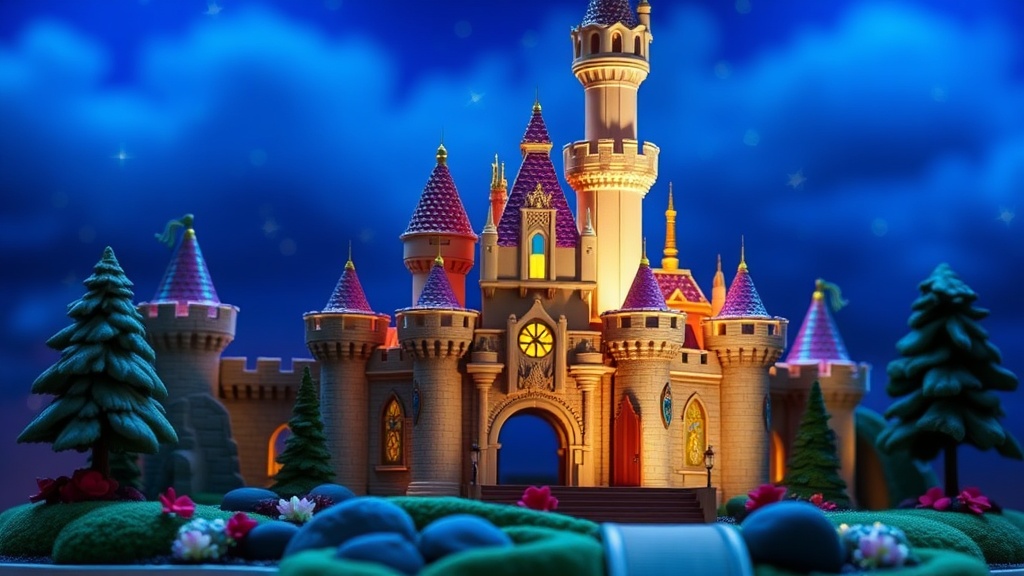
Lighting is the most critical component of an enchanted diorama. If you want that ethereal, glowing look, you need to hide your light source. Instead of just draping lights over the top, weave your micro-LEDs inside the hollow towers and behind the walls. This creates a "glow from within" effect that mimics the way the castles are lit during nighttime spectaculars at the parks.
If you are working on this project during a high-stress season, don't forget to manage your own energy levels. Much like how we discuss syncing your routine with your circadian clock to maintain wellness, ensure you aren't burning the midnight oil to the point of exhaustion. A tired brain leads to messy glue work and poor color choices!
Phase 4: The Environment and Final Display
A castle sitting on a bare wooden board looks unfinished. To truly bring the diorama to life, you need to build the "grounds." This is your opportunity to add greenery, water features, or even a small courtyard.
- The Moat: Use clear epoxy resin or even a high-gloss blue paint topped with a layer of clear-drying gloss gel to create the illusion of water.
- The Landscape: Use "flock" (the tiny green bits used in model railroading) to create grass. You can also use crushed dried moss for a more organic, realistic look.
- The Scale Figures: To give your castle a sense of immense scale, add tiny figures. A few miniature knights or even small Disney character figurines can provide a sense of "human" scale to your architectural achievement.
Once your diorama is complete, the way you display it matters. If you have a dedicated hobby room or a home theater setup, the diorama should be a featured piece. To get the most out of your display, consider how it interacts with your existing tech. For instance, if you have a high-end audio setup, you might want to pair your diorama display with a subtle, orchestral soundtrack. You can find great advice on building a cinematic home theater experience on a budget to ensure your viewing environment matches the quality of your build.
The Project Manager's Final Checklist
Before you declare the project "complete," run through this final quality assurance checklist:
- Structural Integrity: Give the base a very gentle shake. Do the towers wobble? If so, reinforce the base with more adhesive or a larger footprint.
- Light Leakage: Turn on the LEDs in a dark room. Are there bright, ugly spots where the wires are visible? If so, use scrap foam or "foliage" to mask the light source.
- Color Consistency: Does the castle look like one cohesive unit, or do the towers look like they belong to a different building? Ensure your "wash" and "dry brush" techniques have unified the colors.
- The "Wow" Factor: Step back five feet. Does it evoke the feeling of magic? If it feels a bit flat, add more light or a bit more texture to the foreground.
Building your own Disney castle is more than just a hobby; it’s an exercise in precision, creativity, and storytelling. By following this structured approach, you move away from the "crafty" look and toward a professional-grade collectible that you can be truly proud to display. Now, go grab your tools—your kingdom awaits!
Steps
- 1
Sketch Your Blueprint
- 2
Gather Your Magical Materials
- 3
Construct the Main Towers
- 4
Add the Enchanted Details